
Installing Ubuntu on a VM Using VirtualBox
A tutorial on how to install and run Ubuntu on a new virtual machine alongside your main OS.Introduction
As a computer science student, I have found the need for a full-fledged Linux distro but ssh-ing onto a separate Linux machine (although wonderful in a pinch) started to become obnoxious. I needed a physical Linux machine.
However, I didn't have a laptop available that I could fully dedicate to running Linux since many of the applications I do run in my spare time are Windows based.
This gave me two options:
1.) Partition my hard-drive and dual-boot both Windows and Linux.
2.) Install a Virtual Machine and run Linux alongside of Windows.
Like most things, pros and cons exist with both.
Pros:
- Can simultaneously run Linux alongside of Windows. To switch between the operating systems, you don't need to fully shut down one and then boot up the other.
- Don't need to sacrifice a full machine to solely run a secondary OS that might not get used all that much.
Cons:
- Since Linux will be run in a VM on the same hardware as your main OS, the computing resources are shared. If process and memory heavy applications are also going to be run inside of Linux or Windows while the VM is running, this could cause for some pegged resources.
Prereqs
Download and install the latest version of VirtualBox for the OS in which you would like to concurrently run alongside of Ubuntu. You will also need an Ubuntu .iso file to install on your virtual machine. This tutorial uses Ubuntu 12.04 LTS 64-bit but any version should work fine.
Needs
- <=4GB Memory
- <=8GB Free HDD Space
- VirtualBox
- Ubuntu (.iso)
Steps
Create New Virtual Machine
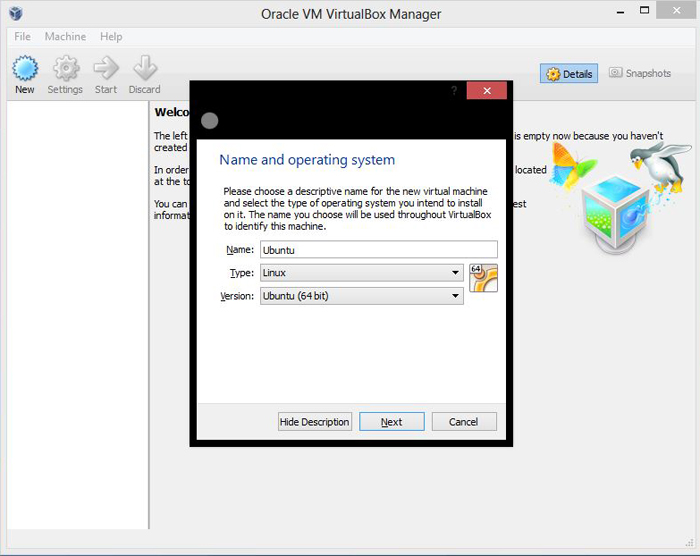
Open up VirtualBox and click New.
Name the virtual machine and select Type: Linux and the Ubuntu version you intend to install.
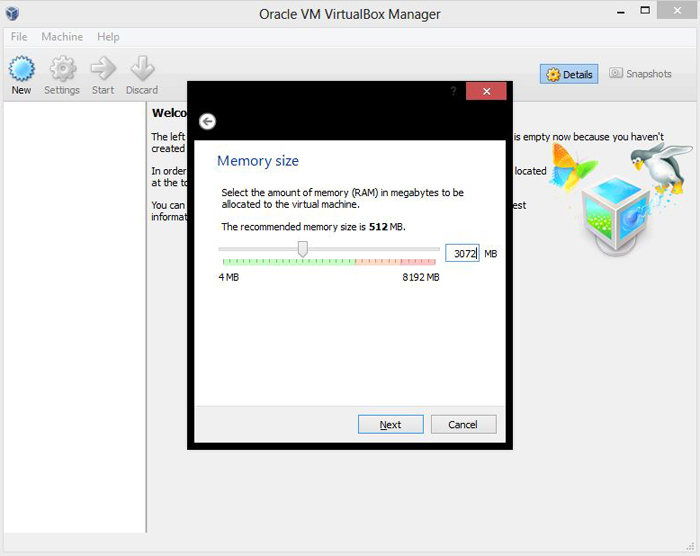
Select the amount of memory you would like to allocate for the Ubuntu virtual machine. VirtualBox recommends that the memory size be at least 512MB, however, the more memory you make available to the VM, the smoother and more powerful it will be. As a rule of thumb, 1/4 of the amount of memory you have on your computer should be just fine. Just like a normal application, this memory will only be utilized when the VM is being run.
Select the virtual hard drive for the new machine to use. If this is the first VM created with VirtualBox, the creation of a new virtual hard drive is needed. The hard drive file type chosen should be VDI (VirtualBox Disk Image). You could point the machine to an existing virtual hard drive as well.
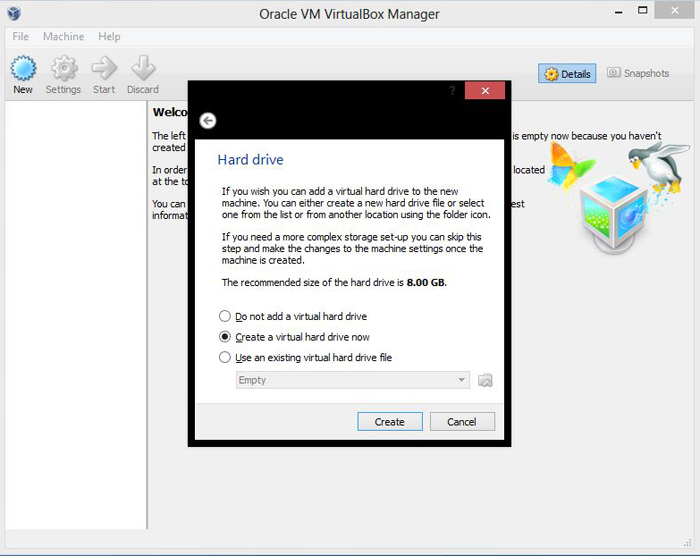
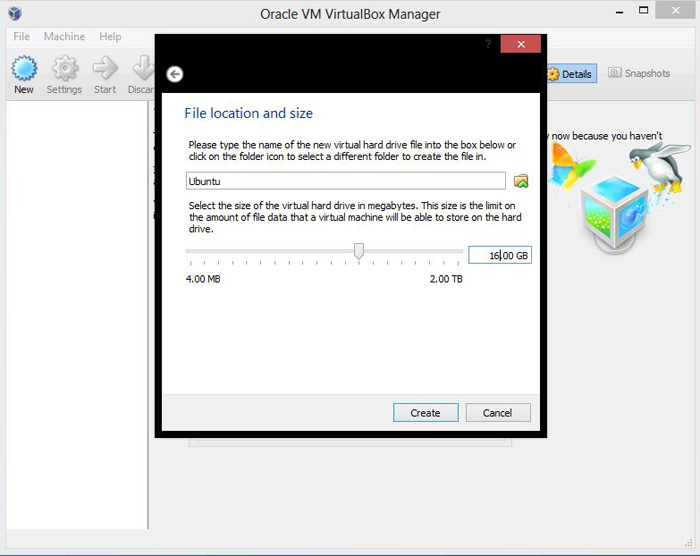
Set the location and size of the new .vdi file. VirtualBox recommends a hard drive of at least 8GB. The Ubuntu installation takes up about 2.3GB of space and the rest of the allocated size is open for files and applications. If you are planning on storing a large amount of data inside of your VM, it may be better to give more than 8GB.
Install Ubuntu
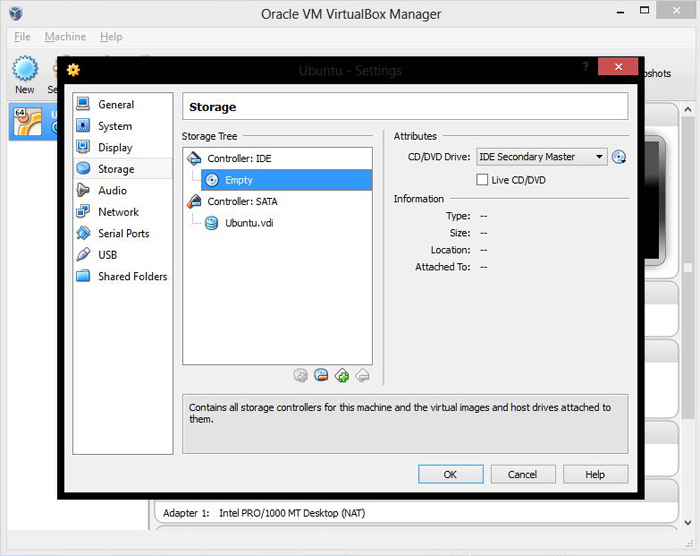
We now need to install the Ubuntu OS onto the new virtual machine. Click the Settings gear and navigate to the Storage section. Highlight the Empty subfield under the Controller: IDE and click the disk icon under Attributes next to the CD/DVD Drive dropdown. Choose a virtual CD/DVD disk file...
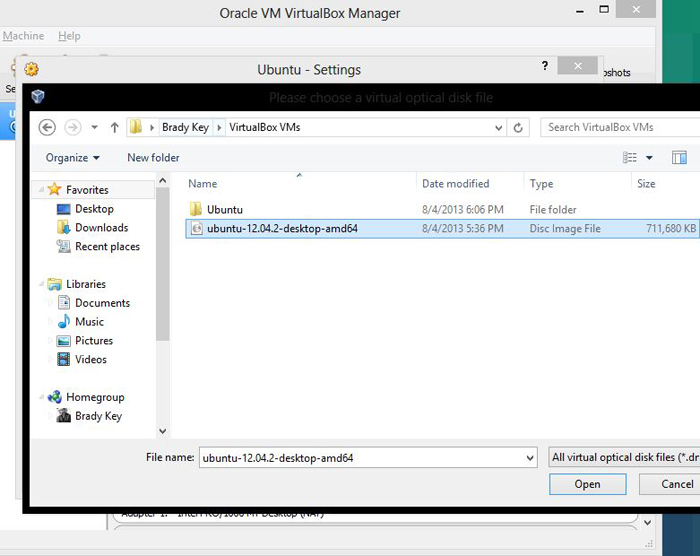
Navigate to the Ubuntu .iso file and click Open. Press Okay.
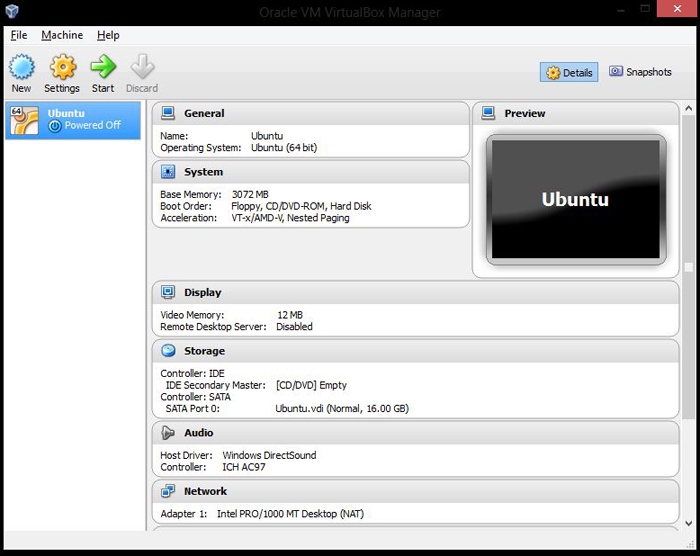
Double-click on the new virtual machine and it will start up in a new window. This will now begin the install of Ubuntu just like it would if it was being installed on any brand new physical machine.
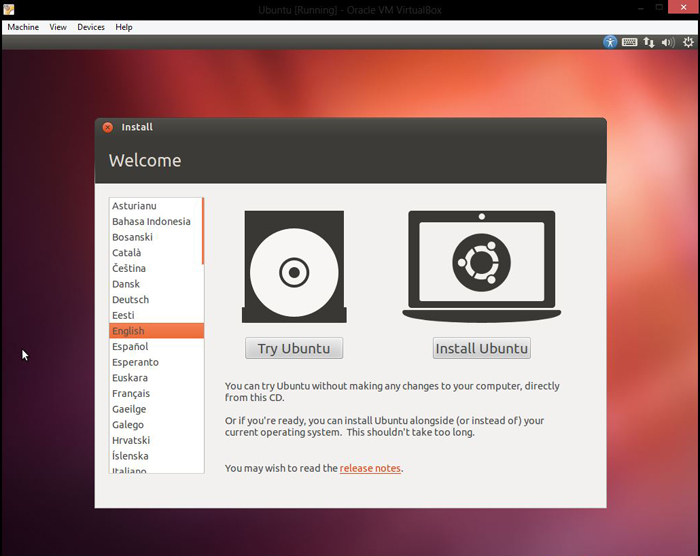
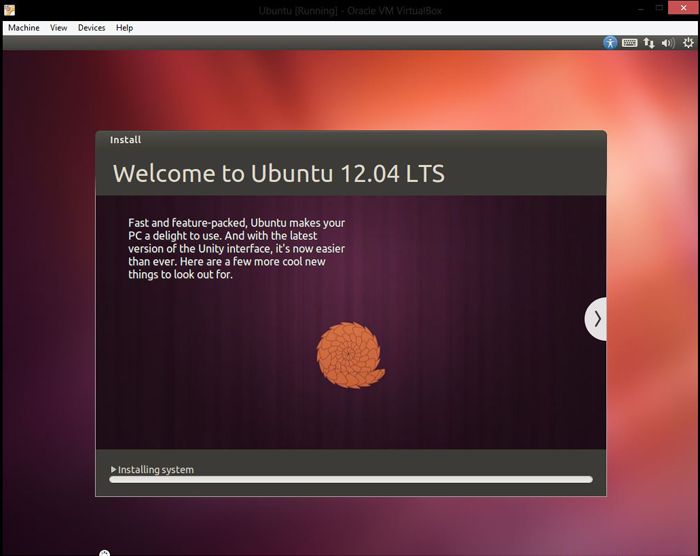
Follow the instructions to install Ubuntu.
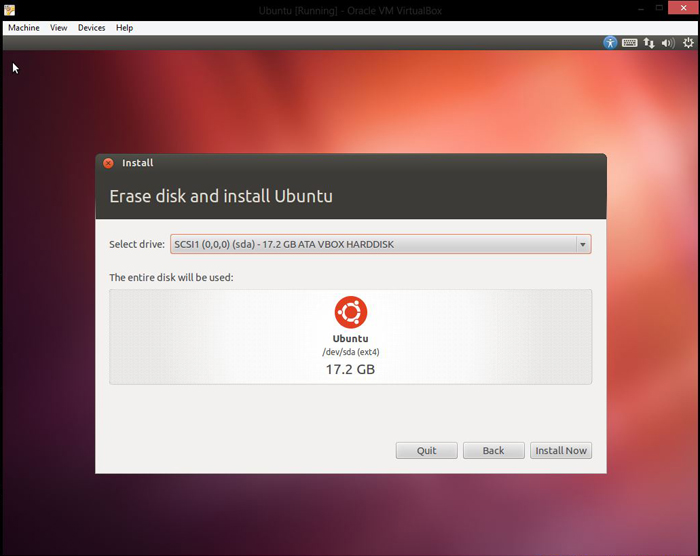
Verify that the dropdown is pointing to the newly created virtual disk and Install now.
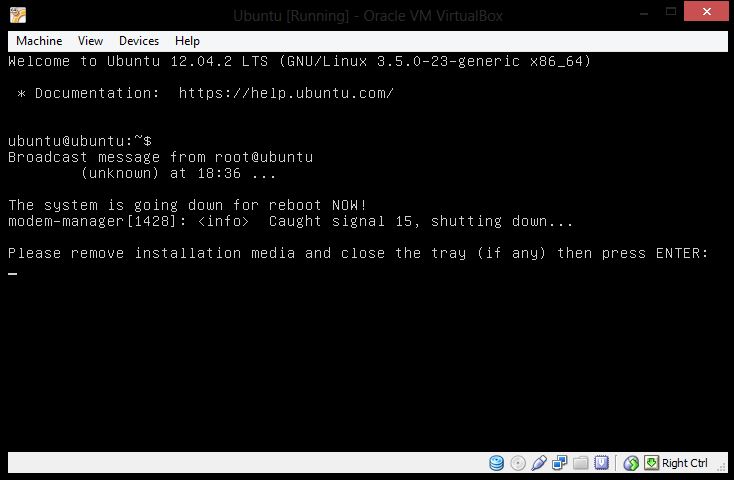
After the installation is complete it will ask you to restart the machine. When you restart, an error will be given asking to remove the installation media. This is because the .iso is still attached as a live CD/DVD in the Controller: IDE. VirtualBox automatically notices this and removes ejects the .iso installation media. Press Enter and it will boot up as normal.
Extras
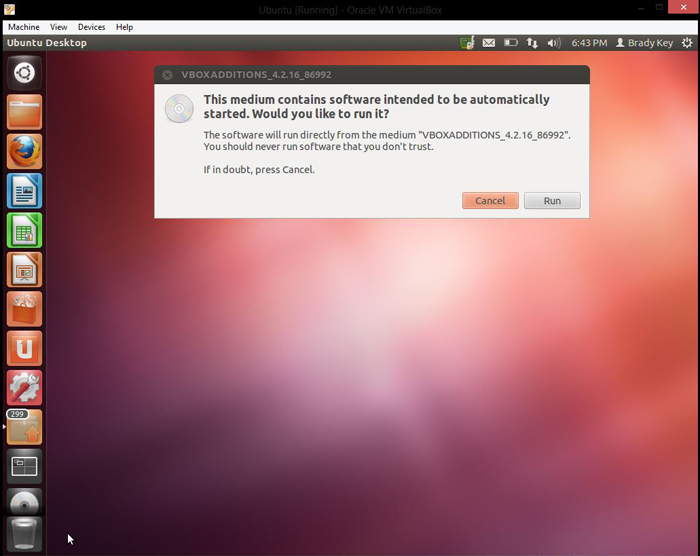
A fully operational version of Ubuntu is now running simultaneously alongside the physical machine's OS. Unfortunately, right out of the box you cannot get Ubuntu to fill the screen when you try to go full-screen (Host-f). This is an easy fix and begins with installing Guest Additions from the VirtualBox toolbar. Devices -> Install Guest Additions.... Press Run and type in your password (if it asks).
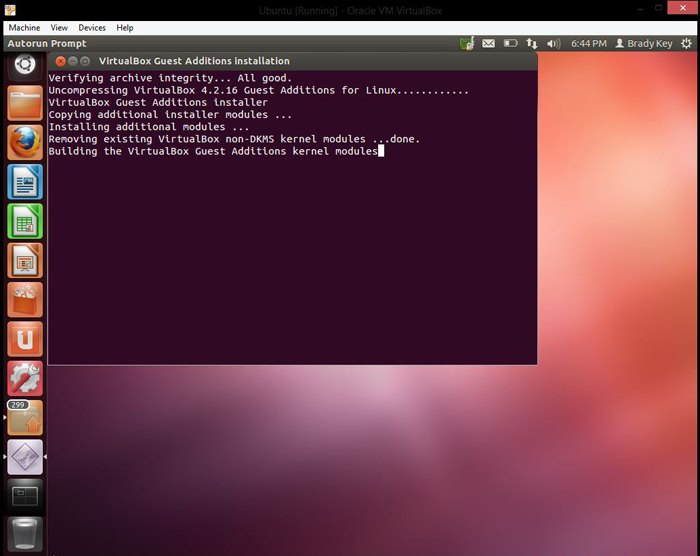
Once installed, reboot the virtual machine. Now when Host+f is pressed, the Ubuntu desktop should fill the entire screen.
Create a shortcut of the newly installed virtual machine to the taskbar by right-clicking on the virtual machine inside of VirtualBox and choosing “Create Shortcut on Desktop”. I changed the .ico of the shortcut to an Ubuntu logo making it 1-click from running a full instance of Ubuntu simultaneously with the physical machine's OS.